Light Up Your Off‑Road Adventures: Best LED Whip Lights for ATVs and Durable Mounting Options
Ripping across dunes at dusk? Crawling a rocky ravine after sundown? Night riding is half the fun of owning an ATV or UTV—unless no one can see you. That’s where vivid, color‑changing LED whip lights for ATV machines step in. They turn your rig into a beacon, keep your crew tight, and add a dash of personality you just can’t miss on a moonless trail. But great whips need great brackets; without secure whip light mounts, even the brightest LED can shake loose on the first whoop.
Below you’ll find a straightforward buyer’s guide—built around Kemimoto’s deep, trail‑tested catalog—to help you choose the right whips, the right mounts, and the right tricks for bullet‑proof installation.
Why Add Whip Lights at All?
- Safety first. Tall, flexible whips glow above dust clouds and sand walls, helping oncoming riders spot you long before a blind corner.
- Group tracking. Color‑code your crew, pick flashing modes, and no one gets lost.
- Nighttime style. Let’s be honest—watching 20 LEDs spiral through 300+ patterns is just plain cool.
- Event rules. Many organized rides and dune parks require whip lights after dark, so installing a set isn’t optional if you want full‑time fun.
Key Features to Demand in an LED Whip
| Must‑Have | Why It Matters |
| High LED count & RGB color | The Kemimoto 5‑ft kit packs 336 5050‑type LEDs per whip—dense enough for crisp patterns visible a quarter‑mile out. |
| Multiple flash modes | Up to 366 light modes, plus speed and brightness controls, let you match the mood, from subtle crawl to EDM rave. |
| Weatherproof build | IP67 sealing keeps dust and creek crossings from frying the circuitry. |
| Flexible PC tube | Bend to 180 ° without snapping; built‑in anti‑vibration springs absorb harsh hits. |
| Quick‑release base | Twist and lift—whip off in seconds for garage parking or trailer transport. |
Want the full spread of sizes, colors, and control options? Browse Kemimoto’s complete lineup of LED whip lights for ATV—from 3‑foot minis to 6‑foot crowd‑pleasers, remotes to Bluetooth apps.
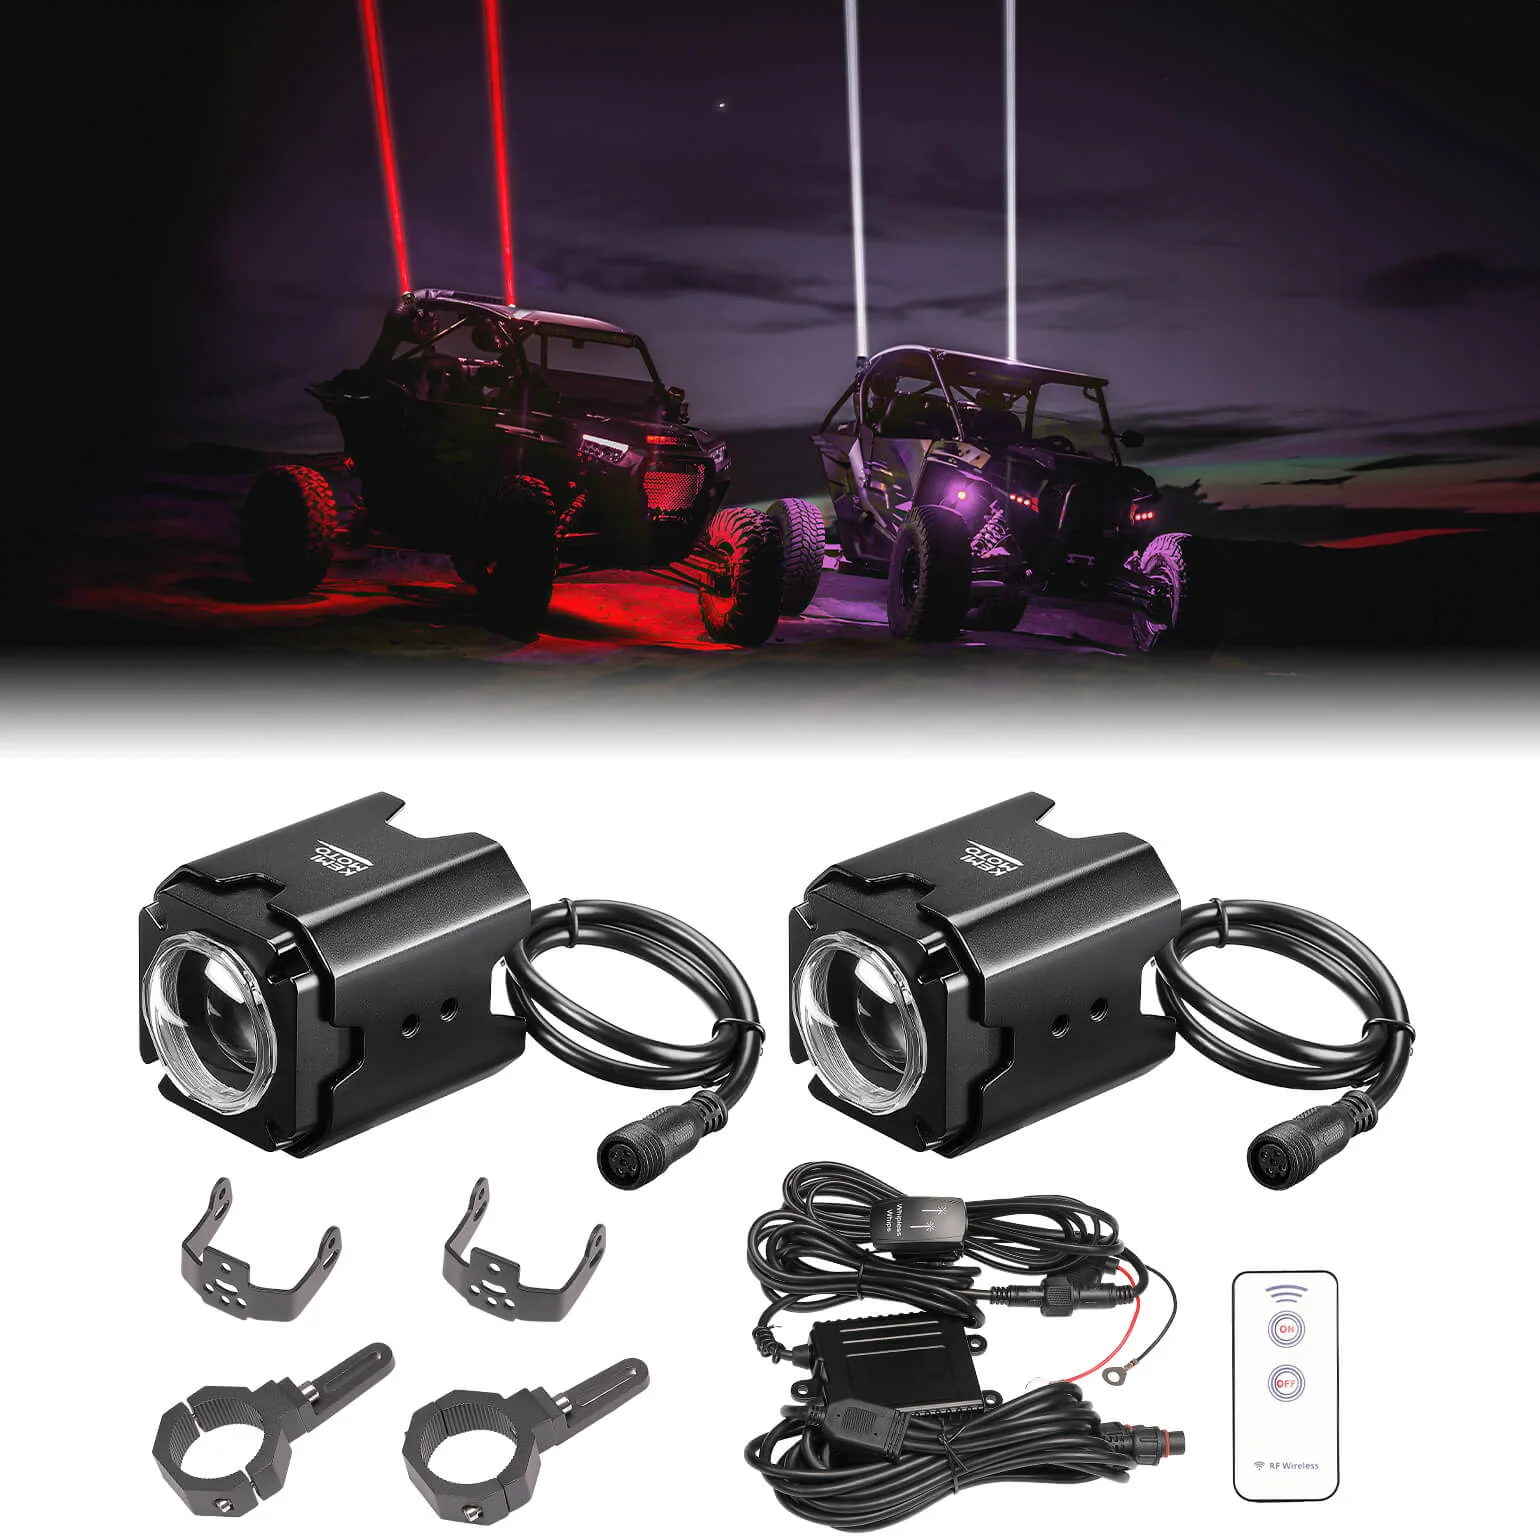
Spotlight Product: Kemimoto 5‑Foot RGB Whip Pair
- True twin pack. Two matched whips keep your rear corners balanced.
- Plug‑and‑play loom. Pre‑wired to connect straight to a fused 12 V source; no guessing which wire powers red or blue.
- Optional spring bases. Swap the fixed stud for a coil spring if you ride forest trails where branches yank at overhead gear.
- Value add‑ons. Bundle brackets or dash‑mounted rocker switches right in the cart and save time hunting for extra hardware. (kemimoto.com)
In other words, it’s a one‑box solution: open, bolt, glow, go.
Why Mount Quality Matters (Almost) More Than the Whip
Imagine spending Saturday morning soldering your new whips, only to watch one smack the sand five minutes into the ride. Solid whip light mounts prevent heartbreak by:
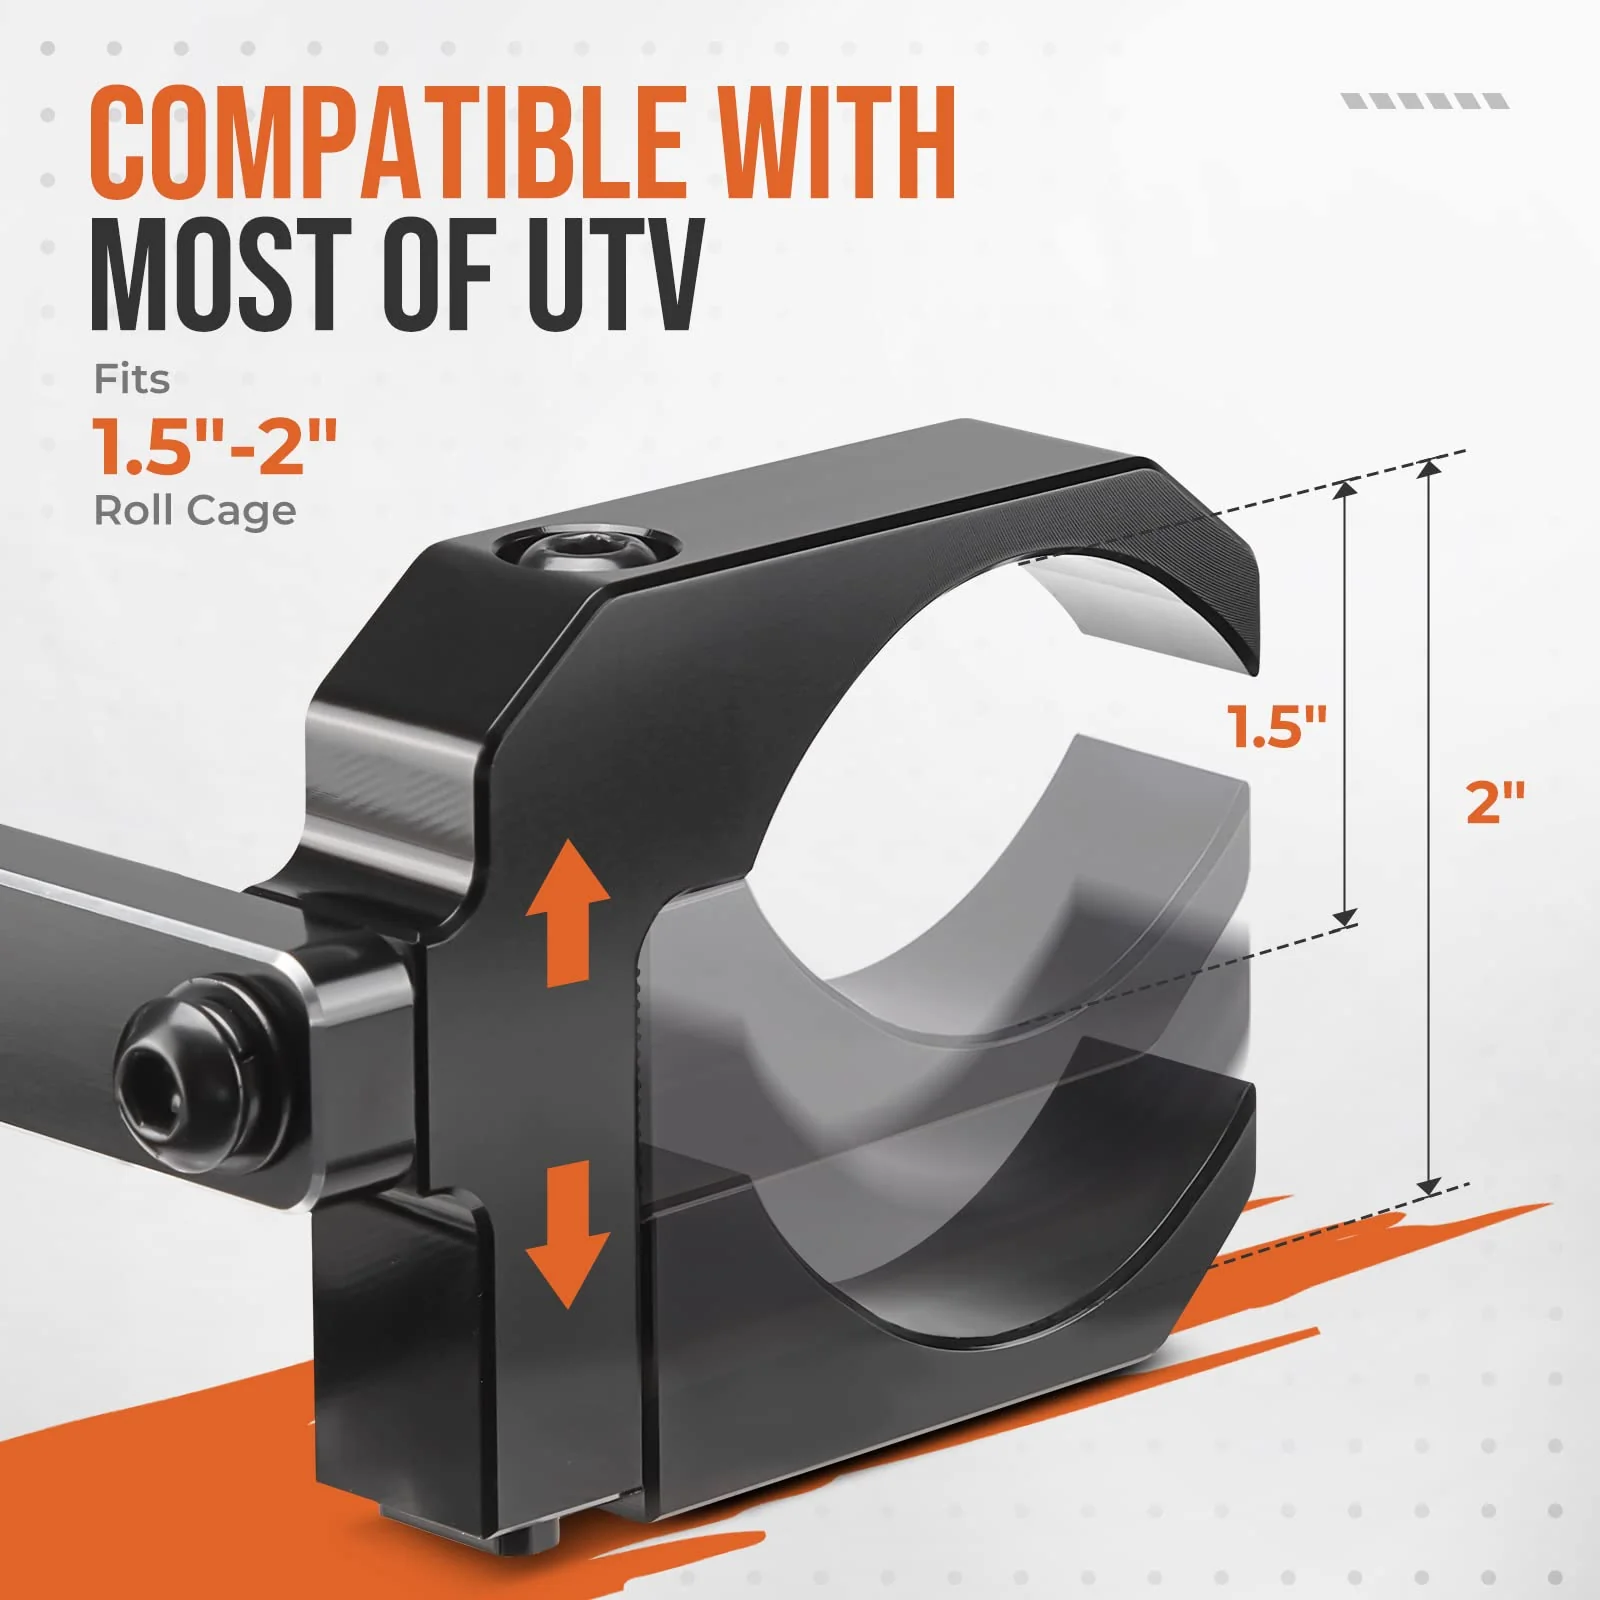
- Clamping rock‑solid to 1.5‑ to 2‑inch roll cages, frame rails, or shock towers.
- Adjusting 360° so your whip stands truly vertical, not leaning like the Tower of Pisa.
- Resisting corrosion with CNC‑machined aluminum and anodized or powder-coated finishes.
Kemimoto’s mount collection covers nearly every bar size and cage style on the dirt.
Top Mounting Options at a Glance
| Mount | Fit Range | Stand‑Out Perks | Source |
| Universal Clamp (1.75″–2″) | Most Polaris, Can‑Am, and Honda cages | 360° rotation; stainless hardware; installs with Allen key | (kemimoto.com) |
| Pro‑Fit Cage Mount | Polaris Ranger/General square tubes | Low‑profile plate bolts into factory holes—no drilling | (kemimoto.com) |
| Quick‑Angle Flag Mount | 12 mm stud hole | Single‑bolt loosen/tilt for trailer clearance | (kemimoto.com) |
| Spring Base Upgrade | Any whip using a 12 mm stud | Extra give on rocky washouts; swap in seconds | (kemimoto.com) |
Pick the bracket that matches both your cage diameter and your riding style—fast dunes, wooded switchbacks, or rocky desert ledges.
Step‑By‑Step Installation Tips
- Choose the location. The rear upper corner of the cage keeps the whip high, visible, and out of rooster tails.
- Mock up first. Before tightening bolts, snap the whip in, angle it upright, and check bed‑lid clearance.
- Add dielectric grease to the quick‑connect terminals—stops corrosion when you rinse mud.
- Fuse smart. Use an inline blade fuse rated just above the whip’s amp draw to avoid popcorn wiring.
- Cable‑tame. Spiral loom or zip ties every six inches, keep wires from chafing on sharp steel.
Pro tip: If you ride dunes where flags are mandatory, slide a pennant onto the whip BEFORE you lock the topper nut. You’d be surprised how many riders forget and undo the entire mount later.
Meet Kemimoto: Gear Built by Riders, for Riders
Kemimoto isn’t a random warehouse brand. They design, test, and abuse their own parts on real machines long before launch. That’s why their whip lights boast thick PC casings, their mounts arrive with stainless bolts, and their support team stocks spare remotes when yours bounces into a campfire. From mirrors to doors, gun racks to skid plates, their catalog focuses on function first, with pricing that undercuts many “big badge” competitors.
Final Burst of Trail‑Side Wisdom
A night ride without lights is like s’mores without marshmallows—possible, but why bother? By pairing vibrant LED whip lights for ATV handlebars, racks, or cages with rock‑steady whip light mounts, you get:
- Bigger safety margins when dust clouds the trail.
- Instant style points (and social‑media‑worthy photos).
- Long‑term durability thanks to waterproof circuits and rustproof clamps.
So grab the color that matches your rig, bolt on a mount built for real bumps, and let the glow lead the way. The desert looks different under pulsing RGB beams—trust us, you’ll want to see it. Ready to shine? Hit Kemimoto’s full whip‑light aisle, choose your length, pick your mount, and light up the night with confidence.